Hi. So today we are going to take a glance at how to reuse the unused containers from our kitchen or the plastic food containers which we tend to throw and increase the pollution in our environment. We can use those to grow our microgreens, which helps to increase nutrition in our diet as well as "Save the environment" so lets get started. Shall we?
👉 Two bottoms and one top.
👉 Some sort of potting mix, pretty much anything.
👉 We 're going to plant peas. So pea seeds of course.
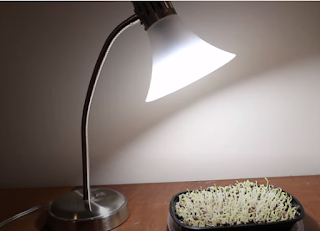
👉 We will also need some kind of daylight bulb lamp, its not entirely necessary though .
👉We will also need something to drill holes into the containers and also a large rock or stone.
That's it. Lets start
Important tip : Temperature should be somewhere between 4700°C and 5700 °C.
First, let's poke those holes in the bins.
Now lets look into the seeds. You ought to soak for six to eight hours, or occasionally I only do it overnight. I just do this before going to bed and then plant the seeds in the morning, but you can do it in the morning and plant the seeds in the evening. It's up to you, whatever works for you. Stuff like pea and sunflower, bigger seeds, you've got to soak it up. You don't need to soak seeds like broccoli or radish as they are really tiny. We got our speckled pea that we're going to grow today.
We're going to let this settle for six to eight hours, and then we're going to plant our seeds. So the seeds were soaking up. Let's just sow them now.
Not too good, barely levelled off. I'm going to water this thing using the hose, you might do it according to your convenience.
Let their water drain out. Add the seeds on the surface, Spread them out. Give it a little bit more water.
Looks fine. Now grab the other bottom tray with holes in it and place it on top of it. Then take your rock and place it on top of it. Then take the lid and place it beneath it all. Now you've got it . The rock is going to keep the seeds under tension to enable them germinate.
Just want to leave it at room temperature for a couple of days, then we're going to check it out.
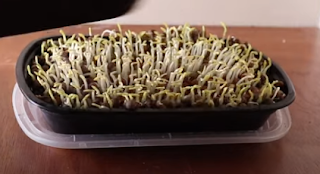
You can see that the seeds have germinated, so they're beginning to rise up a bit, so that's fine.
Now I'm just going to put some water on the bottom here. It's also cool, as this helps in watering uniformly, so it doesn't get all wet. I keep my lamp on for around sixteen hours a day.
And it's been seven days since we planted them, they're ready to harvest, and they look great.
I 'd just cut what we are going to need for the meal and let the rest develop. This way, it remains new. And sometimes, after you cut it, it might even come back a little, and you might be able to make a second cut. You can see how easy it's to raise greens. So, just give it a try.


0 Comments